Have you been wanting to make your own homemade butter but don’t know where to start? This recipe is exactly what you’ve been looking for, an easy way to make homemade butter anytime. I’ve been making my own butter from raw cream for almost a year now. Butter making is a beautiful process! We can get whipped cream and butter from one ingredient, it’s a gift we all should be thankful for. No worries if you don’t have a stand mixer, you can make easy homemade butter with a hand mixer or even just a mason jar and a marble!

To get butter from cream the main goal is to agitate the cream until it changes its form. First, the homemade butter turns into whipped cream then it turns into the bright yellow butter you’re looking for. Have you ever made homemade whipped cream, whipped it too much, and thought you’ve ruined the cream? You are actually minutes away from having easy homemade butter!
What do I Need to Make Butter?
Butter making doesn’t have to be hard, you only need a couple things that you probably already have right in your kitchen!
- Raw cream (we have access to raw dairy, if you don’t I recommend using whole cream that is not ultra-pasteurized)
- Hand mixer(my personal favorite), stand mixer, blender, or a mason jar with a marble
- Big bowl
- Mason jar
- Fine mesh strainer
- Cold filtered water
- Butter crock, container, or plastic wrap
- Funnel(optional)
- Sea salt (optional for salted butter)

Steps to Make Easy Homemade Butter
- Add the cream to your bowl or whatever mixing device you choose to use. I personally prefer using a hand mixer and a giant bowl.
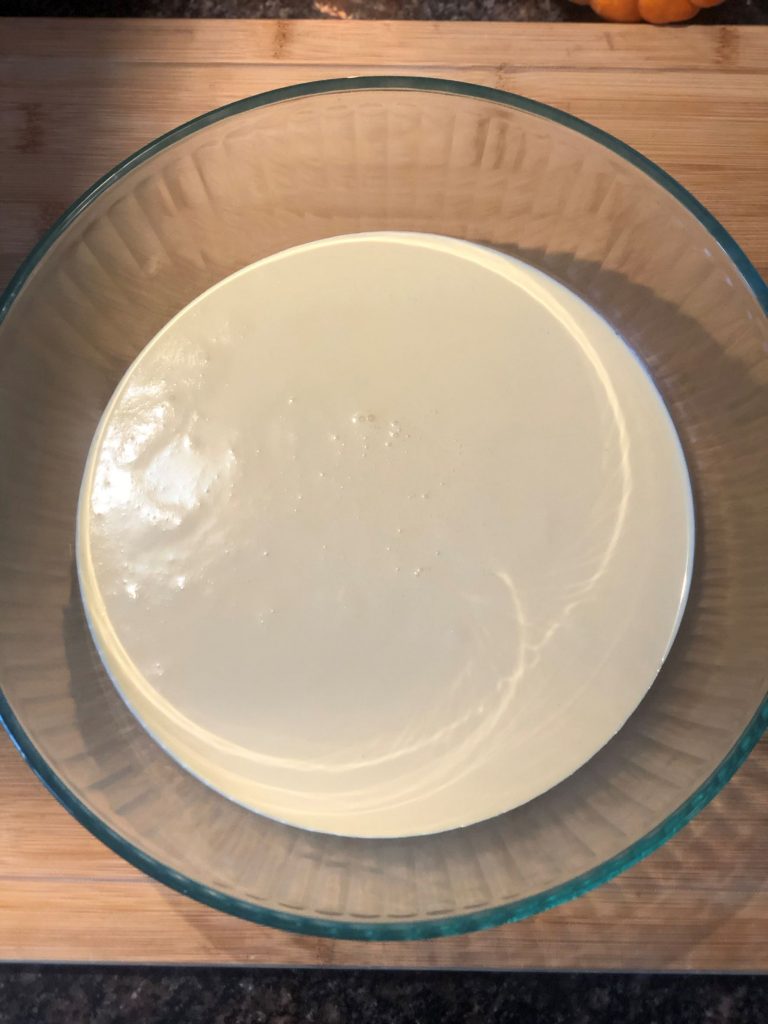
2. Start mixing the cream on low. Slowly start increasing the speed. You’ll notice that the cream will start to thicken and turn into whipped cream. This can take 2-4 minutes(the time depends on the temperature of your cream). You may have to scrape down the sides of the bowl to ensure it gets evenly mixed.

3. Continue mixing the cream on medium-high. You’ll notice the whipped cream start to clump together. That’s the fat molecules mixing with air which end up deflating the whipped cream and clump together. This can take up to 5 minutes. Make sure you are scraping down the sides. You are so close to having easy homemade butter!
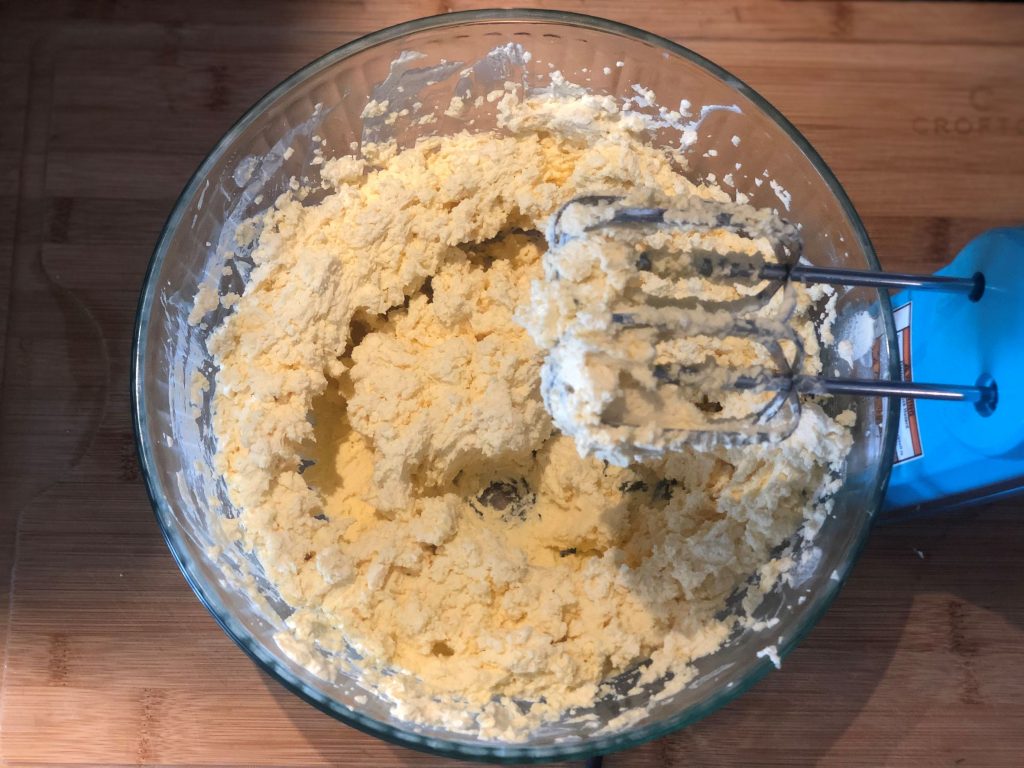
4. Continue mixing on medium-high. The cream will start turning yellow, then the fat will start to break apart which will cause the buttermilk to separate.
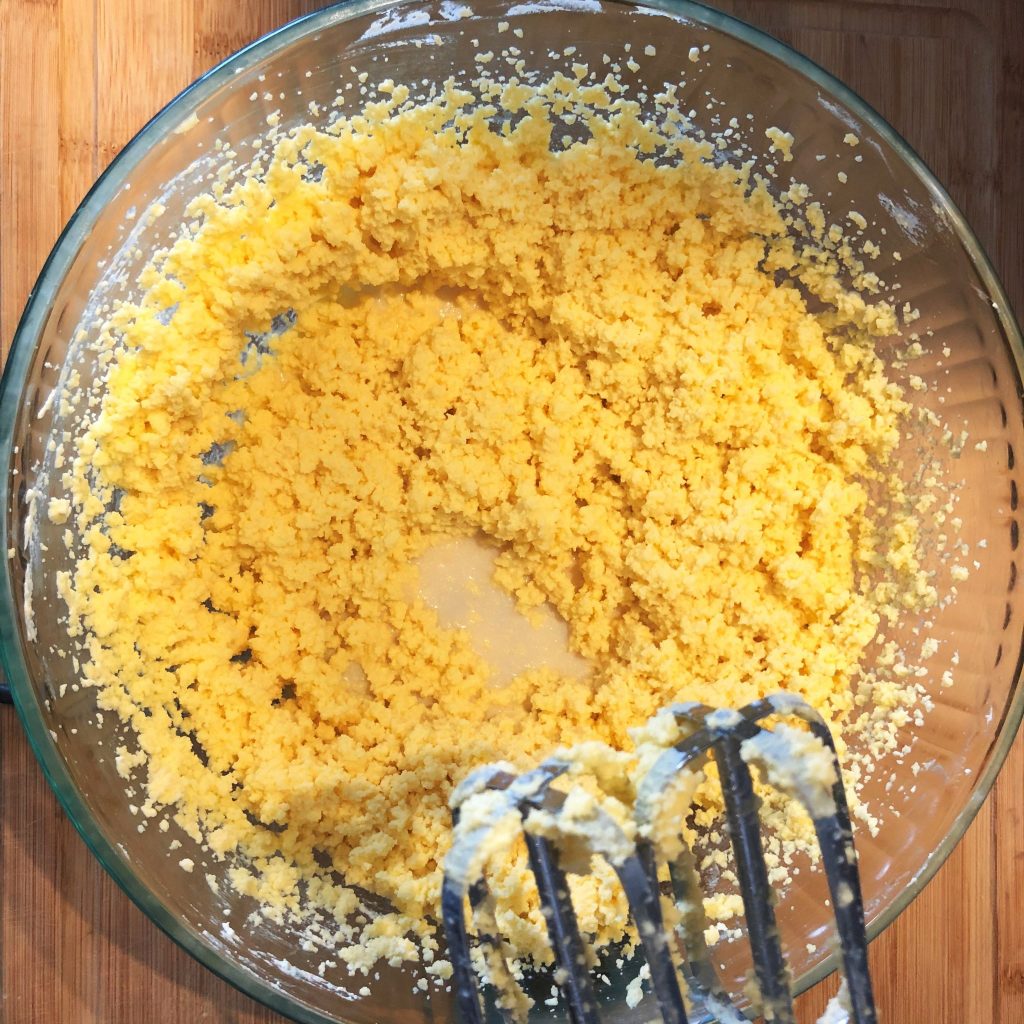
5. Lower the mixer speed to prevent the splashing of buttermilk. Keep mixing to ensure that all the buttermilk separates from the butter. When the buttermilk is separated, the butter will start coming together.
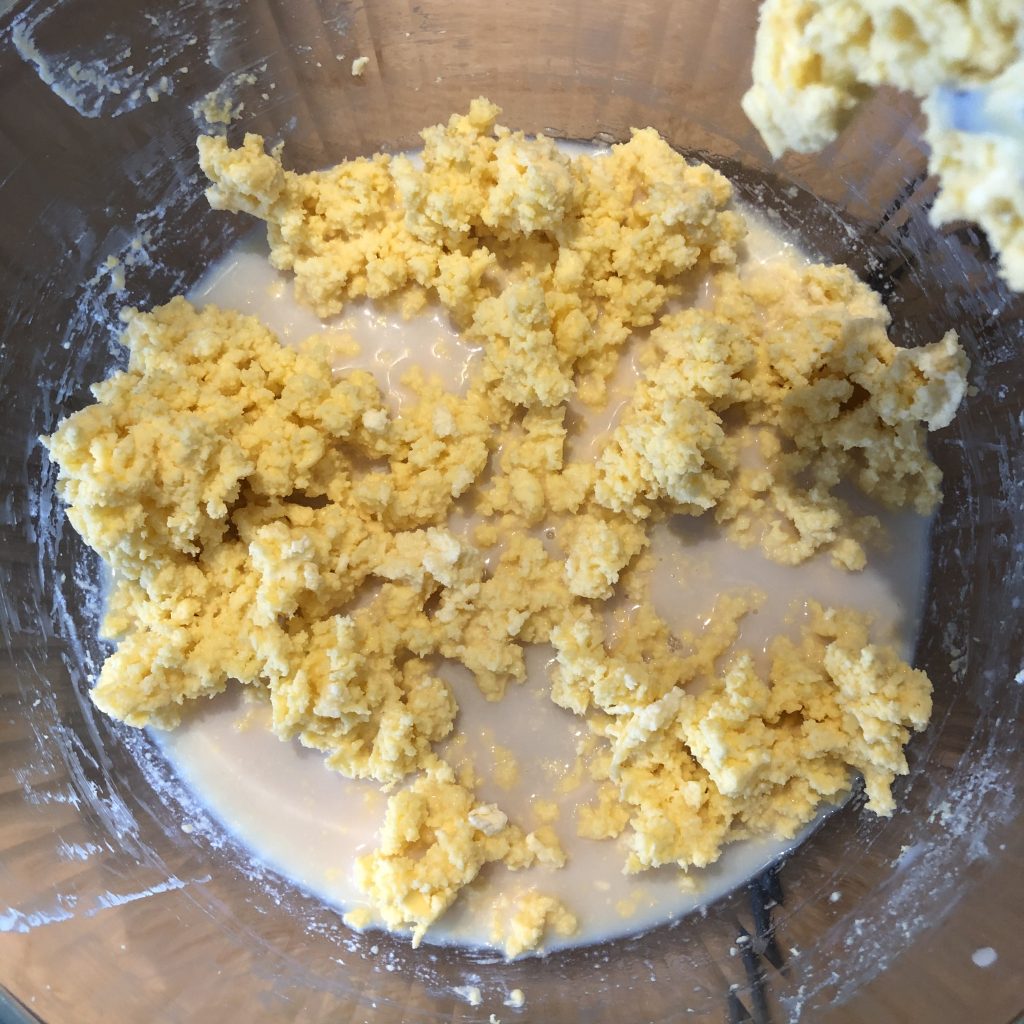
6. Once the buttermilk is separated, I ball my butter up to one side of the bowl, it helps make straining the buttermilk easier. You’ll want to set up your jar you plan to store the buttermilk in. Strain out all of the buttermilk into your jar.


7. Once you’ve strained the buttermilk, pour the cold filtered water over the butter until its covered. Then, begin washing the butter, to wash you’ll want to knead the butter. Kneading the homemade butter helps to get out any excess buttermilk that’s still inside.
It’s important to wash the easy homemade butter to ensure that all the buttermilk comes out, it helps to prevent mold from forming and will make your butter last longer. You’ll want to repeat this process until your cold water runs clear.

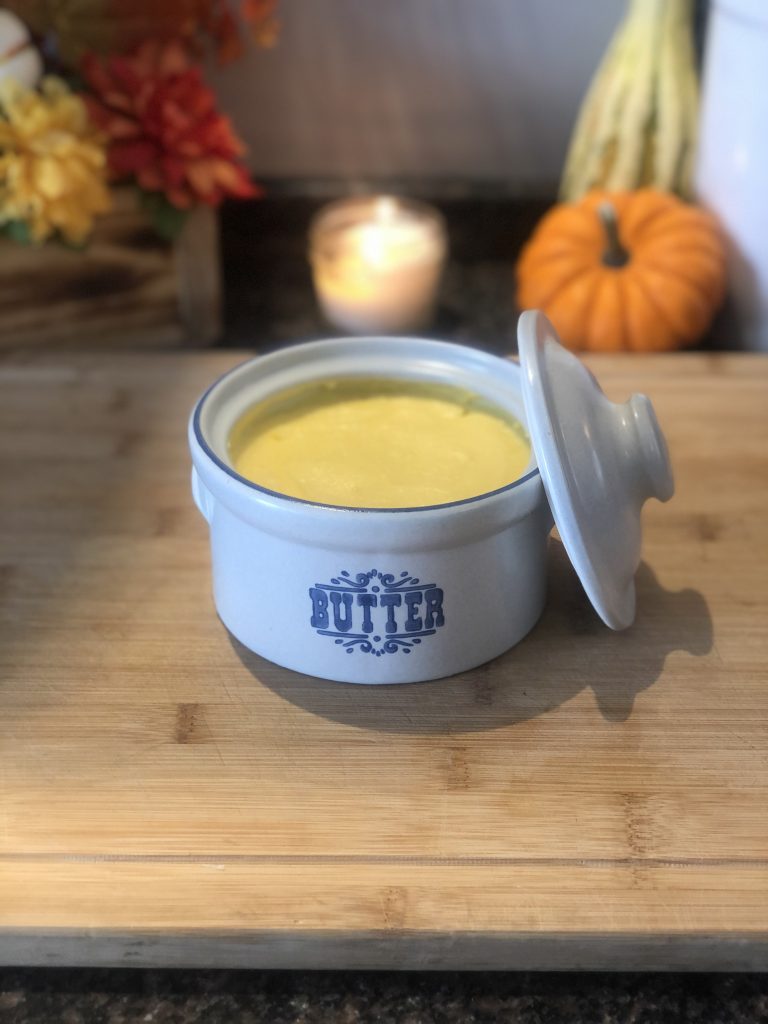
8. Squeeze out any extra water from the butter. Put the easy homemade butter into a butter crock, container, or butter mold for easy storage. You can also wrap it up in plastic wrap to store in the fridge or freeze for future use/preservation.
How Long Does Homemade Butter Last?
I keep my butter in the butter crock at room temperature, on my counter. We use butter a ton, so a whole crock full of butter rarely lasts over two weeks in my house. In addition, the lifespan of easy homemade butter varies on whether or not you got out all of the buttermilk and water from washing. That’s why it’s important to take the time to really squeeze and knead out all the water and buttermilk.
Butter sitting out at room temperature can last many months. You can extend that lifespan of your easy homemade butter by freezing any extra you have to use for a later date. Once homemade butter is frozen, it can last a very long time.
Overall, I always say that our senses are the best indication if something is still good or not. Smell the butter to see if there is any unpleasant odor, throw out butter that smells off to your nose. Also, check for mold, if you didn’t get all of the buttermilk or water out it can cause molding. I’ve never had an issue with butter going bad or spoiling, you’ll probable use it all up before that can happen. Always remember to freeze the extras so you can ensure they wont go wasted.
Isn’t Butter “Bad” for us?
There has been an ongoing lie about butter for years, that it’s bad for us and our heart health. This fabricated lie is pushed on the general public to get us to turn away from what actually can heal our bodies. I’ve done a ton of my own research on farm fresh raw dairy and the research shows there’s nothing better for us than raw farm fresh dairy. No hydrogenated seed oil, fat, margarine, shortening, or vegan butter compares to raw fresh butter nutrition wise. This quote from Weston A. Price says it all:
Heart disease was rare in America at the turn of the century. Between 1920 and 1960, the incidence of heart disease rose precipitously to become America’s number one killer. During the same period butter consumption plummeted from eighteen pounds per person per year to four. It doesn’t take a Ph.D. in statistics to conclude that butter is not a cause. Actually butter contains many nutrients that protect us from heart disease. First among these is vitamin A which is needed for the health of the thyroid and adrenal glands, both of which play a role in maintaining the proper functioning of the heart and cardiovascular system. Abnormalities of the heart and larger blood vessels occur in babies born to vitamin A deficient mothers. Butter is America’s best and most easily absorbed source of vitamin A.
https://www.westonaprice.org/health-topics/know-your-fats/why-butter-is-better/
As you can see from this passage heart disease is not in direct correlation with consuming raw butter. Our bodies and organs actually rely heavily on cholesterol. All of our organs need cholesterol to thrive and function properly. I’ve learned so much about our organs and what the truly rely on in the blue GAPS book (Gut and Physiology Syndrome).
In the 1940’s research indicated that increased fat intake caused cancer.5 The abandonment of butter accelerated; margarine–formerly a poor man’s food– was accepted by the well-to-do. But there was a small problem with the way this research was presented to the public. The popular press neglected to stress that fact that the “saturated” fats used in these experiments were not naturally saturated fats but partially hydrogenated or hardened fats–the kind found mostly in margarine but not in butter. Researchers stated–they may have even believed it–that there was no difference between naturally saturated fats in butter and artificially hardened fats in margarine and shortening. So butter was tarred with the black brush of the fabricated fats, and in such a way that the villains got passed off as heroes.
https://www.westonaprice.org/health-topics/know-your-fats/why-butter-is-better/
Weston A. Price found that majority of these studies demonizing butter were giving the blame to the wrong fat. When in reality the blame completely falls on margarine, hydrogenated oils, and hardened fats. In fact, raw butter is extremely healthy for our bodies and health. Butter contains vitamin A which is essential to a healthy immune system; short and medium chain fatty acids also have immune system strengthening properties. Hydrogenated fats on the other hand have an excess of long chain fatty acids found in polyunsaturated oils and many butter substitutes, which both have a terrible effect on the immune system.
I recommend that everyone do their own research. Look into the studies that everyone uses as “evidence”. You can learn a lot from doing your own research. You will see how many flaws and inconsistencies are in these studies. Butter is a super food with tons of necessary vitamins and nutrients that our bodies and especially young growing bodies need.
Easy Homemade Butter

Ingredients
- Raw cream(we have access to raw dairy thankfully, if you don't I recommend using whole fat cream that is not ultra-pasteurized)
- Hand mixer(my personal favorite), stand mixer, blender, or a mason jar with a marble
- Big bowl
- Mason jar
- Fine mesh strainer
- Cold filtered water
- Butter crock, container, or plastic wrap
- Funnel (optional)
- Sea salt (optional for salted butter)
Instructions
- Add the cream to your bowl or whatever mixing device you choose to use. I personally prefer using a hand mixer and a giant bowl.
- Start mixing the cream on low. Slowly start increasing the speed. You'll notice that the cream will start to thicken and turn into whipped cream. This can take 2-4 minutes(the time depends on the temperature of your cream). You may have to scrape down the sides of the bowl to ensure it gets evenly mixed.
- Continue mixing the cream on medium-high. You'll notice the whipped cream start to clump together. That's the fat molecules mixing with air which end up deflating the whipped cream and clump together. This can take up to 5 minutes. Make sure you are scraping down the sides. You are so close to having easy homemade butter!
- Continue mixing on medium-high. The cream will start turning yellow, then the fat will start to break apart which will cause the buttermilk to separate.
- Lower the mixer speed to prevent the splashing of buttermilk. Keep mixing to ensure that all the buttermilk separates from the butter. All the butter should start to come together once majority of the buttermilk is separated.
- Once most of the buttermilk is separated, I like to ball up my butter to one side of the bowl to make straining the buttermilk easier. You'll want to set up your jar you plan to store the buttermilk in. Strain out all of the buttermilk into your jar.
- Once the buttermilk is strained take the cold filtered water and pour some over your butter. Begin kneading the butter, that's inside cold water, to help squeeze out any excess buttermilk that's left in the butter. You'll want to repeat this process until your cold water runs clear.
- Squeeze out any extra water from the butter. Add in desired amount of sea salt if you want salted butter, knead the butter again to distribute evenly. Lastly, put the easy homemade butter into a butter crock, container, or butter mold for easy storage. You can also wrap it up in plastic wrap to store in the fridge or freeze for future use/preservation.
Notes
- Butter sitting out at room temperature can last many months.
- You can extend that lifespan of your easy homemade butter by freezing any extra you have to use for a later date. Butter can last a long time once its been frozen.
- I keep mine out at room temperature inside a butter crock, it can last a long time.
- Always use your senses (smell and sight) when determining if your butter is still good or not. There should be no unpleasant odor and no mold present.
Recommended Resources
Below I made a list off credible sources for information regarding raw dairy and dairy in general. Along with information on farm fresh meats, organ meat, traditional food preparation techniques, and knowledge on the gut and how we can properly heal.
- Weston A. Price Foundation
- GAPS Program
- Real Milk
- Nourishing Traditions Book by Sally Fallon
- GAPS, Stage by Stage, With Recipes by Becky Plotner
- Gut and Physiology Syndrome by Dr. Campbell-McBride
Lets connect!

Homesteading Heartland
Hi, I’m Mattalynn, happy to have you here on this wonderful journey to a sustainable lifestyle, from scratch foods, and traditional cooking techniques. I share how we can break the cycle of modern living through a homemade, meaningful, nourishing lifestyle.
If you don’t feel as though you fit the typical molds that modern society sells us and you don’t want to give into over-consumerism, you found the right place!
Thanks for every other informative website. Where else may just I get that type of information written in such a perfect way? I have a venture that I’m simply now operating on, and I’ve been at the look out for such information.
Hello! Thank you so much. Nourishing Traditions is a great book regarding ancestral and traditional food preparation/techniques like making butter from scratch! But also looking up Weston A. Price online is a great place to start too, they share lots of recipes and in depth articles too regarding these same topics. I hope this helps you! 🙂
I have been exploring for a little for any high-quality articles or blog posts in this kind of area . Exploring in Yahoo I eventually stumbled upon this website. Reading this info So i’m satisfied to exhibit that I have an incredibly just right uncanny feeling I discovered exactly what I needed. I so much without a doubt will make certain to do not omit this website and give it a glance regularly.
Thank you, I’m glad you’re enjoying the blog, more posts are coming soon!
Great write-up, I am normal visitor of one¦s site, maintain up the nice operate, and It’s going to be a regular visitor for a long time.
We are a group of volunteers and starting a new scheme in our community. Your web site provided us with valuable info to work on. You have done a formidable job and our entire community will be thankful to you.
I do trust all the ideas you’ve offered to your post. They are really convincing and can certainly work. Still, the posts are too short for newbies. May you please lengthen them a bit from subsequent time? Thanks for the post.
Thank you for the feedback!