The tallow rendering and purification process isn’t as hard as it sounds. Whether you’re looking to render tallow for cooking and frying, or looking to purify tallow to be cosmetic grade for skincare. This step by step guide will answer all the questions you’ve been asking!
What do I Need to Make Tallow?
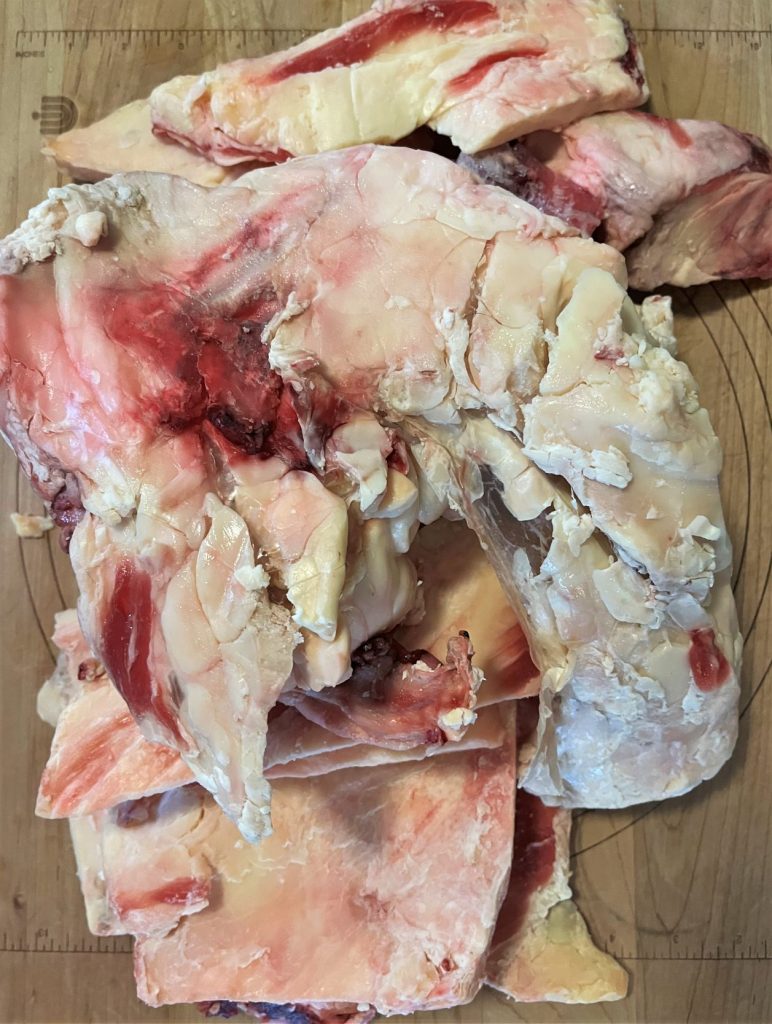
- Grass-fed and finished raw beef fat (beef leaf fat also known as beef suet, pictured below)
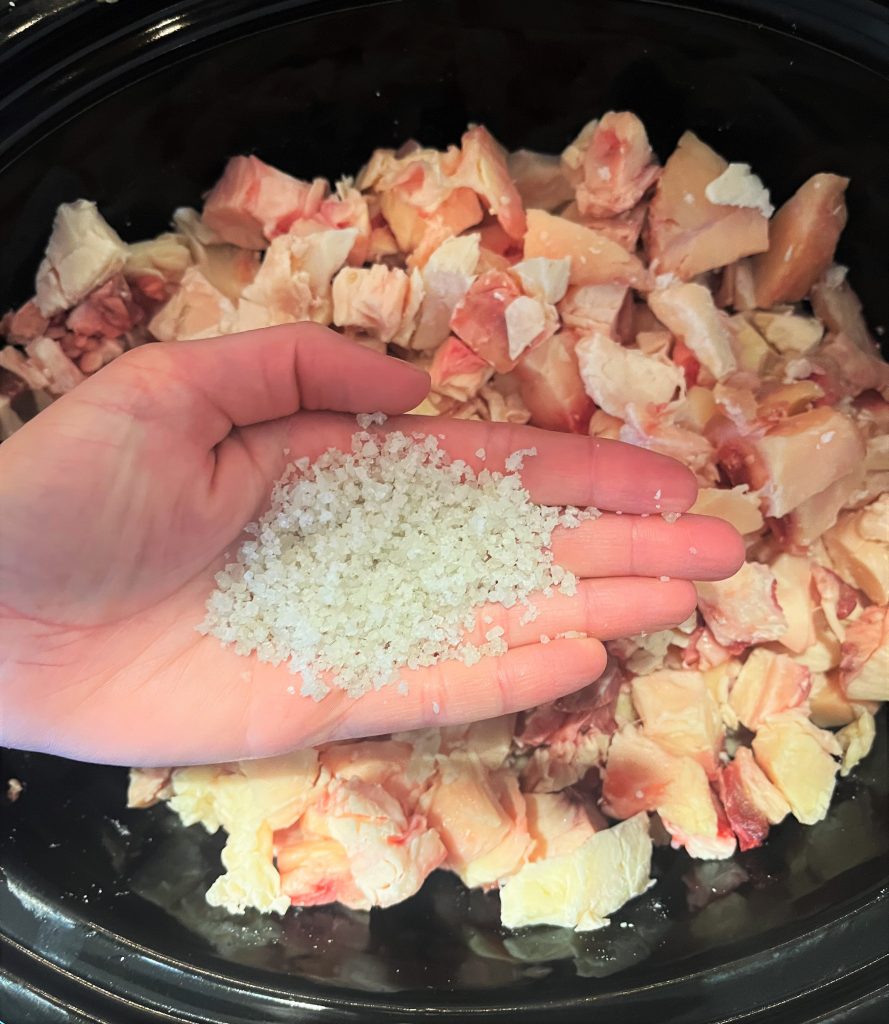
- Mineral sea salt, 2-3 handfuls per crock pot of beef fat (Redmond’s Real Salt is a great brand)
- Filtered water, a couple cups to keep the tallow from burning
Equipment and Utensils Needed
- Crock pot or slow cooker
- Ladle or big spoon
- Bowl (one that’s big enough to hold the rendered liquid tallow and water after straining)
- Stainless steel mesh strainer
- Cheesecloth (for straining)
The Wet Rendering Method
When making tallow for skincare or cosmetic needs, I find it easiest to use the wet rendering method. It ensures that the tallow will be clean, white, and odorless. Which is exactly what’s needed for a high quality tallow skincare product.
The wet rendering method is simply putting raw beef suet, filtered water, and mineral sea salt into a crock pot/slow cooker. Then slow cooking the fat on low to render the tallow out for about 8 hours.
Steps:
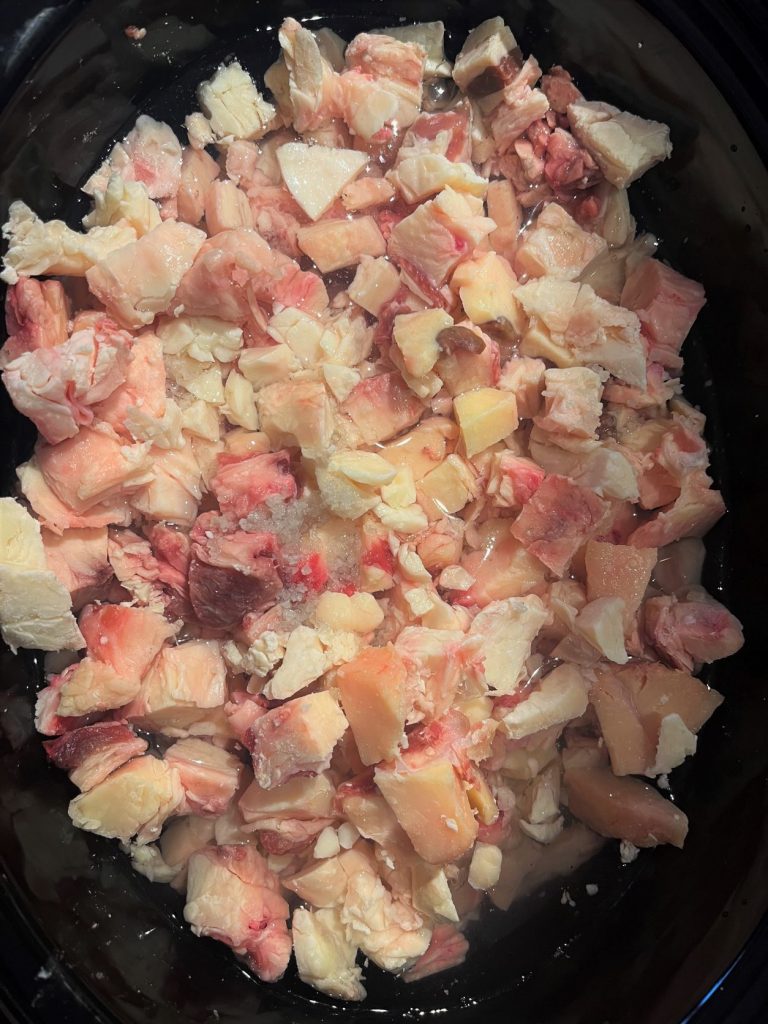
1. Cut raw beef fat into smaller chunks or run it through a meat grinder. Some butchers will also grind up animal fat for you if you ask.

2. Add the cut up beef fat into a crock pot along with two handfuls of mineral sea salt.
3. Add a couple cups of filtered water to the crockpot.
- Make sure to not over do the amount of water you add to the crock pot. Always make sure there is room for the melted tallow to take up space within the pot. Water is used to make sure the tallow doesn’t burn while rendering.
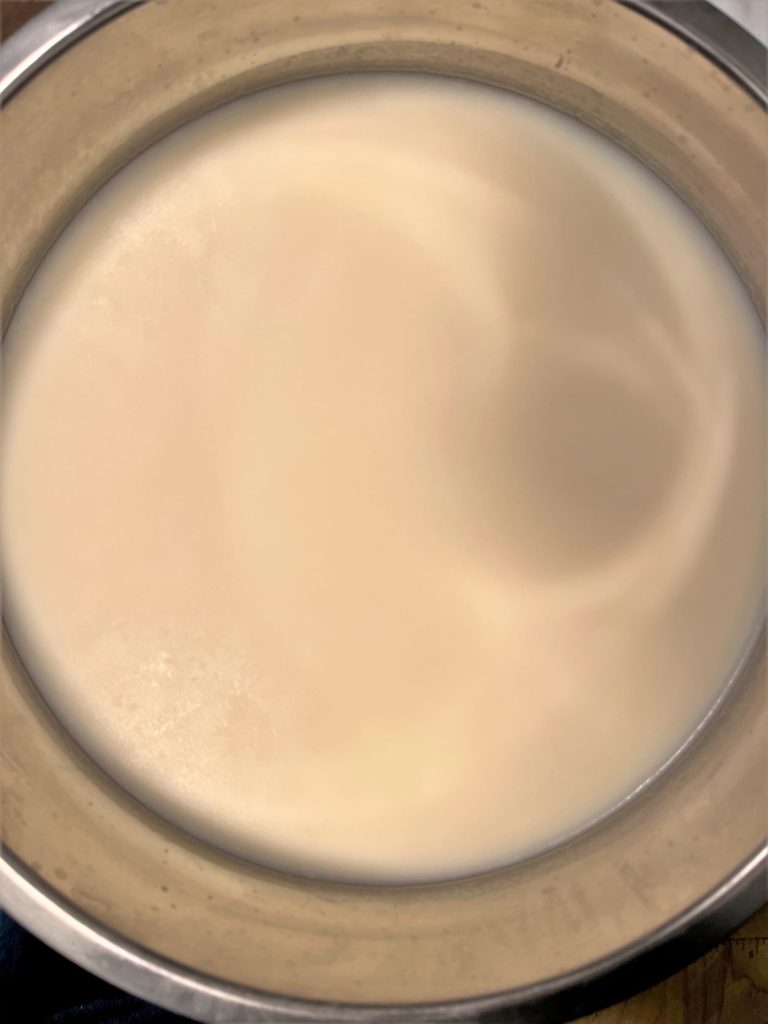
4. Set the crock pot to low and cover with the lid. Let the beef fat come to a simmer, it will take around an hour.
5. Once the water is simmering, set a timer for 8 hours.
- An easy way to fit rendering tallow into your schedule is by starting the rendering process an hour or two before bed so it can render in the crock pot on low overnight. Then, easily enough, by the morning time its done and ready to strain.
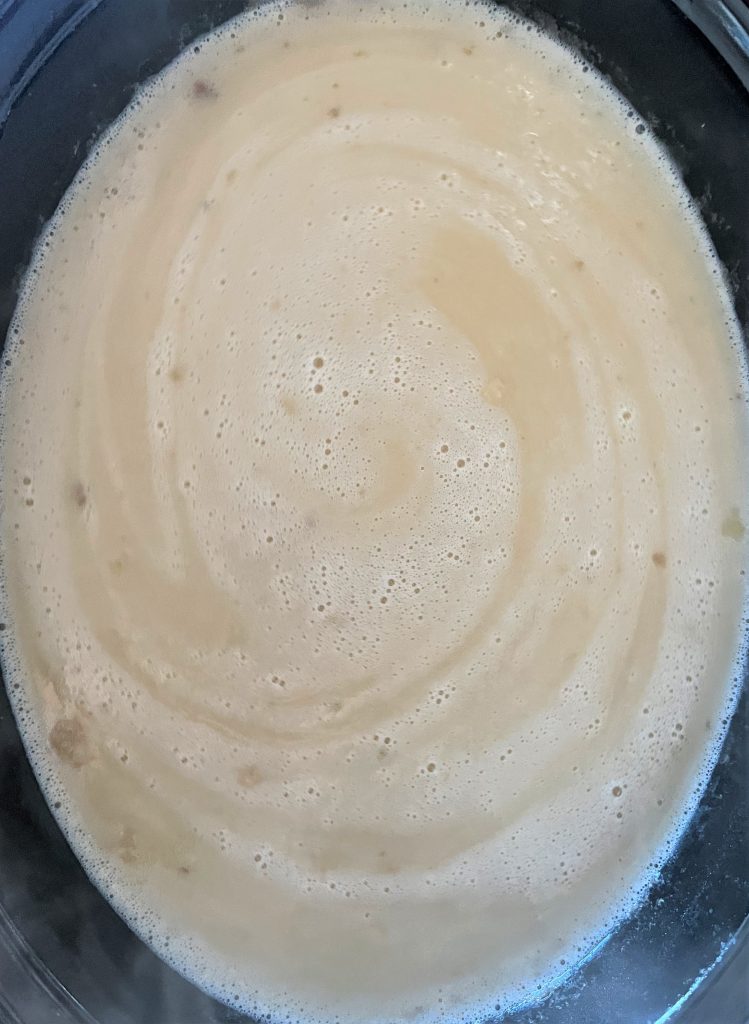
6. OPTIONAL STEP: Immersion blend the ingredients inside the crock pot during or after the rendering process.
- Below I show immersion blending during the rendering process. Once I was done, I put the lid back on and let it continue to simmer on low.
- If rendering overnight for 8 hours, an immersion blender will make the straining process easier.

- Immersion blending ensures that we utilize all the tallow that can be rendered from the beef fat. It also helps to make the first straining process a lot easier since there won’t be nearly as big of beef fat chunks to strain out.
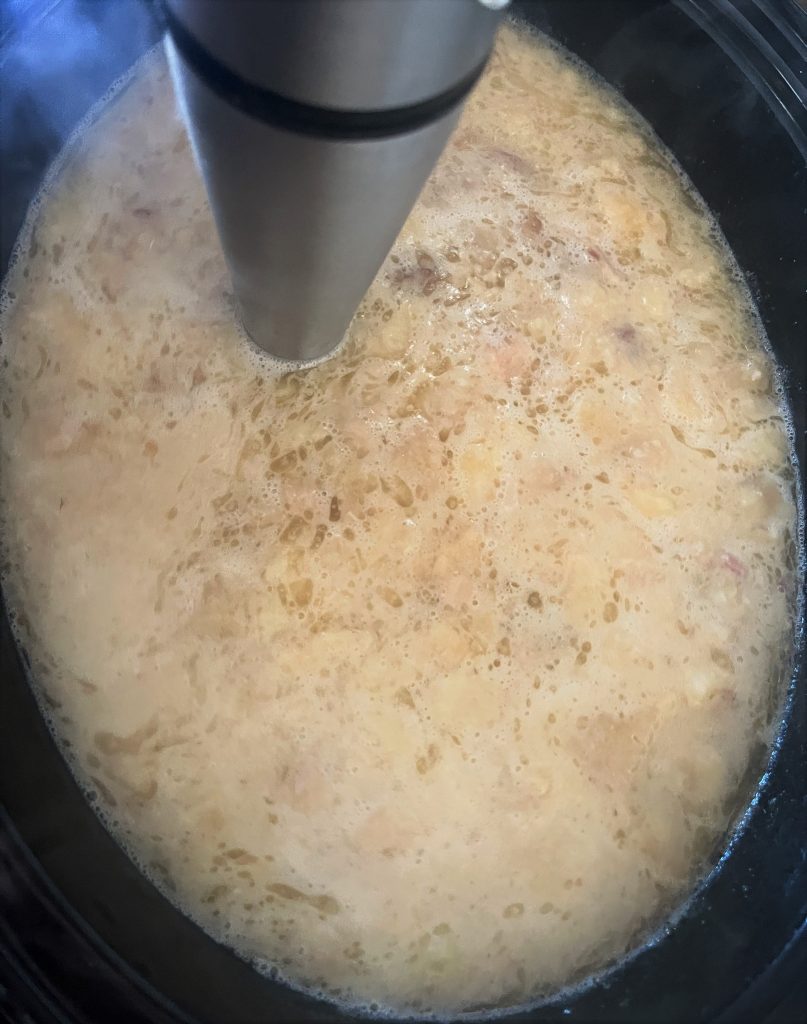
- This step isn’t 100% necessary, which is why its labeled as optional, but it really does help to make the process easier and no tallow goes to waste!
7. Using a ladle, strain the rendered tallow from the crockpot into a bowl that has a mesh strainer and a piece of cheesecloth.
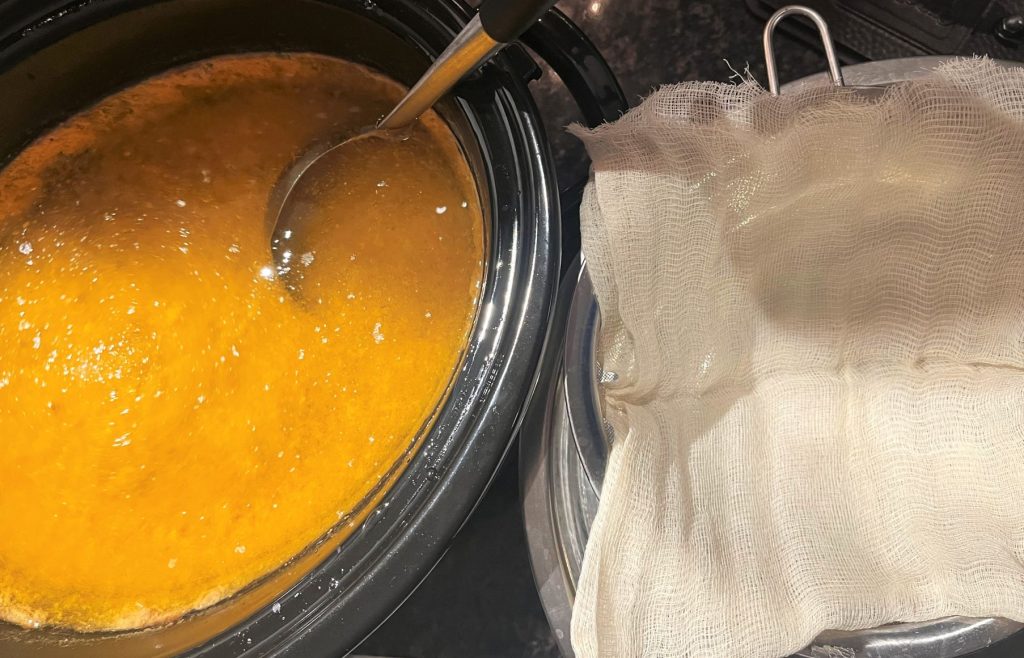
- If using cotton reusable cheesecloth, re-wash the piece that’s being used multiple times to ensure the tallow will strain through all the way. Discard the leftover bits and pieces of beef fat, there won’t be much if you did Stage 6 – Immersion blending the beef fat.
- If using non reusable cheesecloth, having extra squares cut out to use on hand works very well. Since there will be a buildup of fat and pieces of beef fat in the cheesecloth from straining. I find it works best to discard the cheesecloth once it gets lots of buildup and replace with a new fresh piece of cheesecloth.
8. Allow the bowl of tallow and water to solidify at a cool room temperature, overnight, or you can pop it into the fridge to speed up the process. (popping into the fridge also helps to make the solidified tallow much more firm, so popping it out of the bowl is much easier)
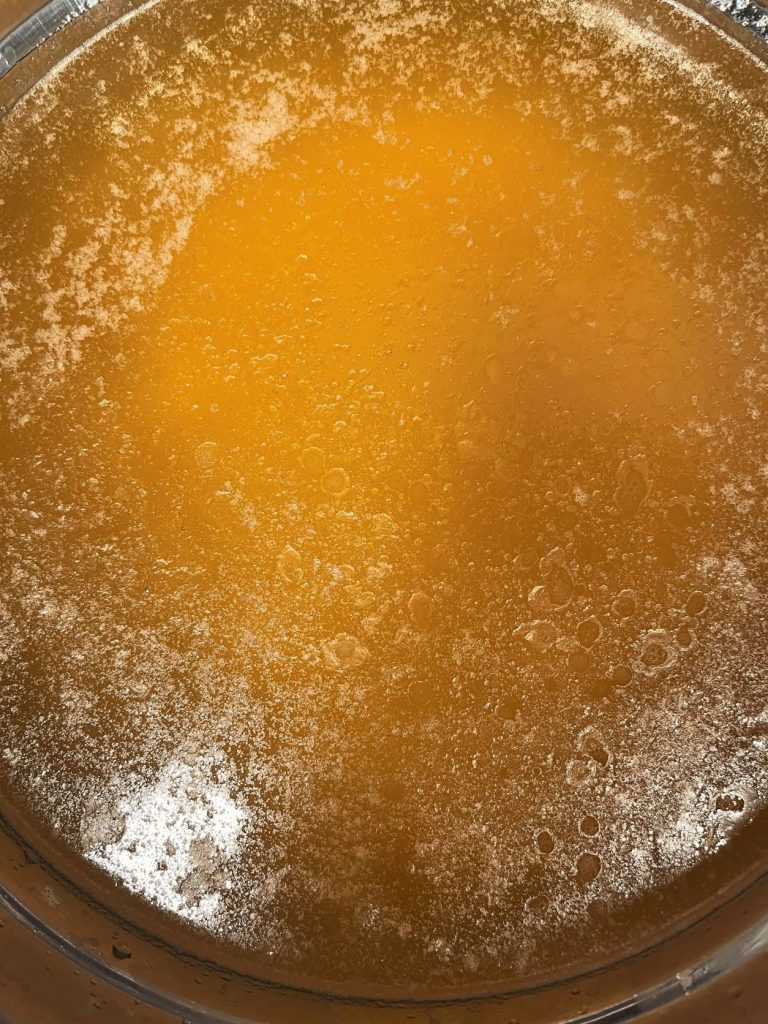
9. Once the tallow is solidified and firm, pop it out of the bowl. You’ll notice that the water and salt is dirty and brown looking, separated from the tallow at the bottom of the bowl. That’s very common for the first rendering process. It’s normally cloudy and brown. The “dirtiness” of the water happens because as it’s rendering, the salt works to draw out impurities within the tallow. Those impurities then end up in the water after the tallow solidifies.
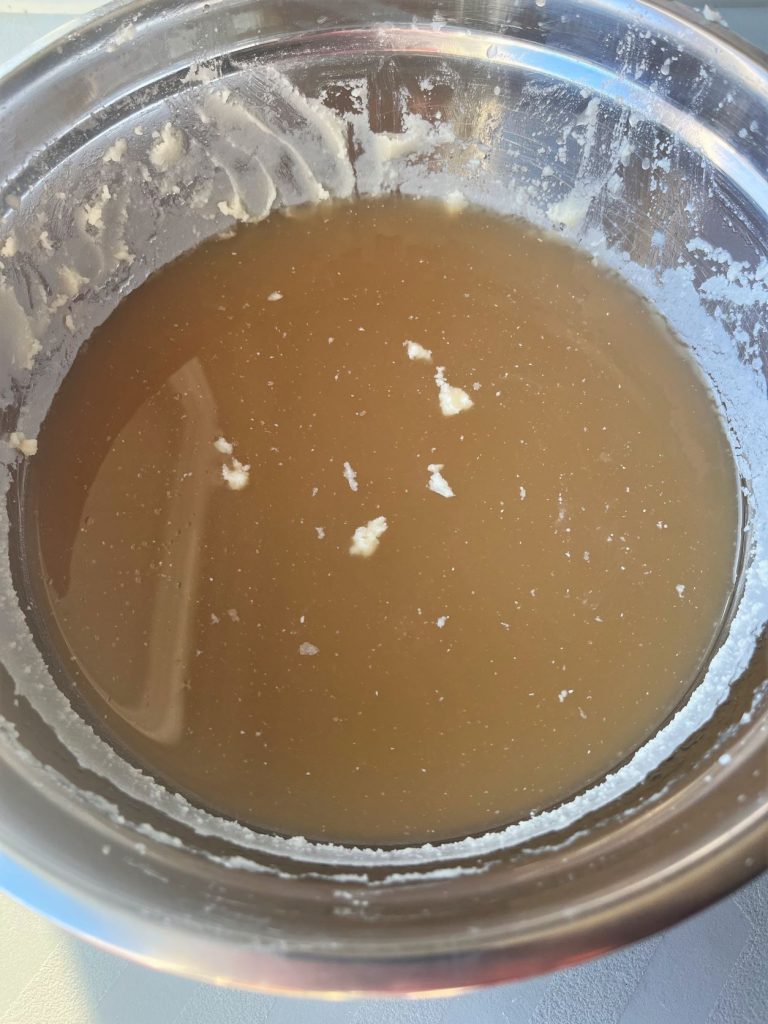
10. Flip your solidified tallow upside down and scrape the impurities off and discard.
(Skip step #11 and Continue below to Purify tallow to be cosmetic grade)
11. If planning to use the tallow for cooking, stop after this step, tallow for cooking doesn’t have to be purified. The beef flavor and smell that’s normally produced in tallow is actually great for enhancing the taste of foods.
- The finished solidified tallow can be double boiled at a low temperature and poured into glass jars for storage.
- Double boiling your finished tallow will ensure that the water leftover will separate to the bottom of the glass. Once it’s gently double boiled, carefully pour out the tallow into jars making sure to leave out any leftover water at the bottom. (water leftover in tallow will lead to molding)
- Tallow can be stored at room temperature or in the fridge.
Purifying Tallow to be Cosmetic Grade
- When wanting to make skincare or cosmetic products with tallow, it’s best to use odorless and white, cosmetic grade, tallow so there isn’t any beef smell but still packed full of nutrients.
- Cosmetic grade tallow is made by using the wet rendering purification process over and over again until the end product comes out white, clean, and odorless.
- The one major difference between the first rendering process and the other purifying processes is the rendering time. The purifying process of tallow only takes 1 hour compared to the first initial 8 hour rendering process.
Steps:
1. Taking the tallow that was just rendered, repeat the the steps of the Wet Rendering Method. At Step 5, after its come to a light simmer on low, set a timer to purify for only 1 hour instead of 8.
2. After 1 hour of purifying, continue to repeat the steps from the Wet Rendering Method, strain the tallow and allow the purified tallow to solidify.
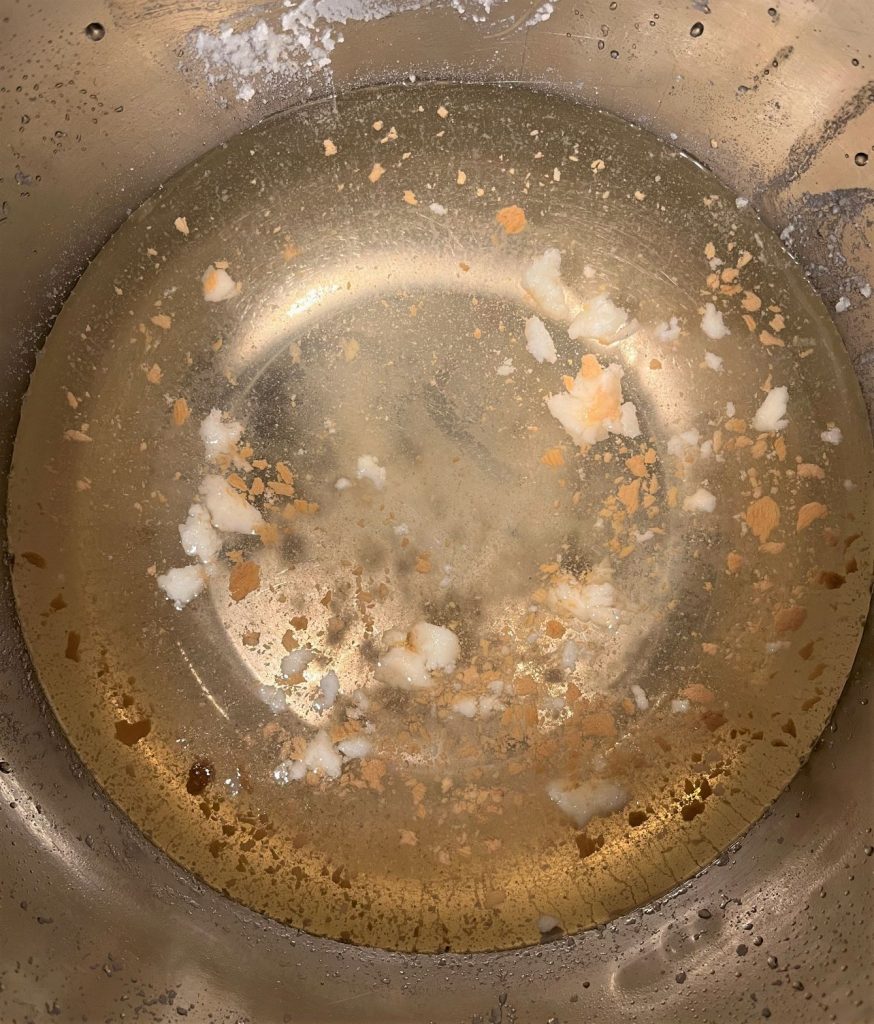
3. After the purified tallow has solidified, pop it out of the bowl. Scrape off the impurities from the bottom once again.
- You’ll notice only after one purification that much less dirty water and impurities end up in the water. Also, the tallow is overall much more white, this is a great sign! The purification has started and we are one step closer to having white, pure, and odorless cosmetic grade tallow!
4. Next, continue to repeat the same steps as used before to purify the tallow another time. (I purify my cosmetic grade tallow about 3-4 times)
Continue to repeat the Wet Rendering Method as many times as needed to get purified cosmetic grade tallow that looks like:
- clean water when the solidified purified tallow is popped out
- white color
- no odor
- little impurities on bottom of the finished solidified tallow
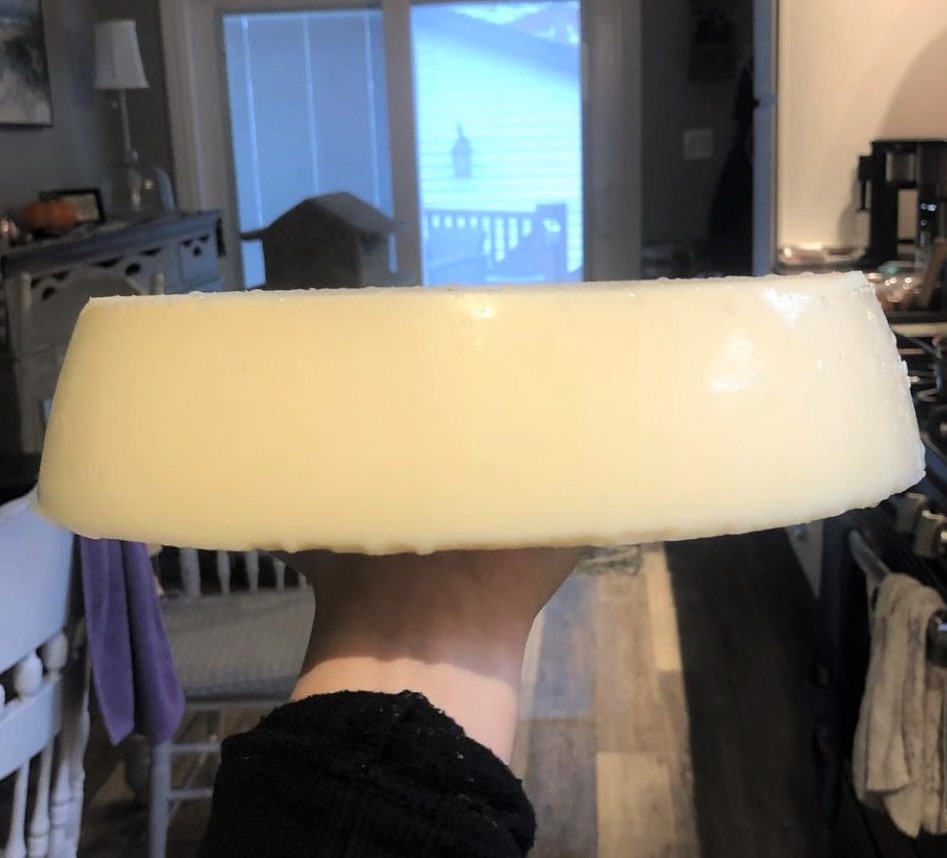
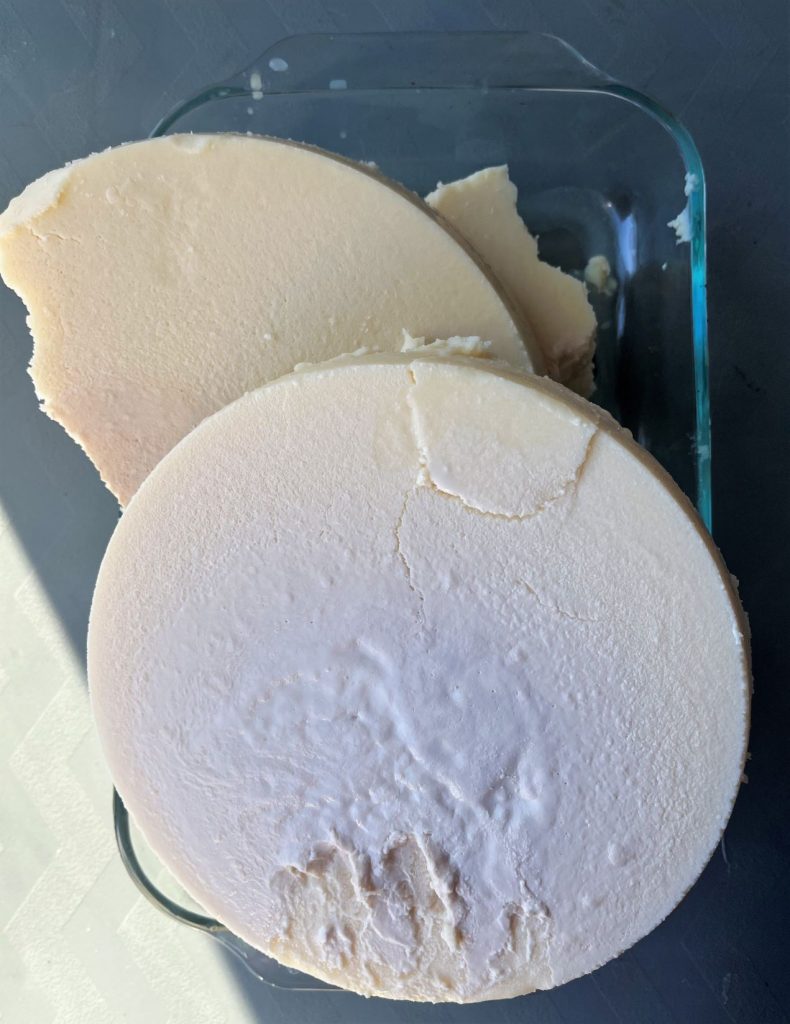
Below is what finished white purified tallow should look like after a good 2-4 purification processes. Scrape off any impurities that gather at the bottom. In addition, the water leftover in the bowl should look clean when the tallow is finished.


5. Once the tallow is completely purified, continue onto Step 11 of the Wet Rendering Method.
- When using tallow for skincare its best to not have any water leftover in the end product. Double boiling purified tallow allows the leftover water to separate from the melted tallow at the bottom of the glass. Make sure the water that separates out to the bottom doesn’t get into the tallow while pouring into a glass jar for storage.
How Many Times do I Have to Purify the Tallow?
That all depends on how clean your purified tallow ends up after each process. After each purification process smell the tallow. Does it still have a beef odor? If you smell a beef odor then it could need another purifying. Otherwise, if there’s no smell, the tallow itself is a good white color and the water is clean. You now have purified cosmetic grade tallow! Make sure to use enough sea salt to help draw out the impurities.
It takes me a good 3-4 1 hour purifications after the initial long 8 hour rendering process to get completely white and odorless cosmetic grade tallow. It’s a beautiful process that forces you to slow down and be thankful for all that we can do with the nourishing and healing foods God has gifted us from animals.
Why Didn’t the Tallow Come out Firm After Letting it Solidify?
To achieve a firm tallow block put the bowl in the fridge or a cold place covered to solidify. Doing that helps to speed up the solidifying time and also helps the tallow firm up. Firm tallow makes it easier to pop directly out of the glass or stainless steel bowl being used.
How Amazing is Beef Tallow?
Grass-Fed and Finished tallow comes from cattle that have only grazed on pasture, have never been fed grain or corn, and have eaten natural grasses in its entire life. Grass-fed tallow is one of the most healing and nourishing fats known to man.
- It’s abundant in conjugated linoleic acid (CLA) which has powerful anti-inflammatory properties
- It’s full of fat soluble vitamins A, D, E, K, and B12
- Naturally has fewer PUFA (polyunsaturated fats) source
- Tallow provides substances that our skin naturally loses as we age such as Palmitic acid and Palmitoleic acid
- Also prevents and helps heal breakouts since it has antimicrobial properties
Recommended Resources
- Weston A. Price Foundation
- Gut and Physiology Syndrome book by Dr. Campbell-McBride
- Gut and Psychology Syndrome book by Dr. Campbell-McBride
- Nourishing Traditions book by Sally Fallon
- GAPS, Stage by Stage, With recipes Book by Becky Plotner

Let’s Connect!
Hi, I’m Mattalynn, I share how we can break the cycle of modern living through a homemade, meaningful, nourishing lifestyle. My goal is to encourage, inspire, and motivate others to take charge of their own health. I’m happy to have you here on this journey to learn more about health, from scratch cooking, and traditional food preparation techniques.
Keep up with me behind the scenes on Instagram, check out my pin-able recipes on Pinterest, and other information on Facebook!
COME WITH ME ON THIS ADVENTURE OF HEALING, CULTIVATING LIFELONG SKILLS, LEARNING TO USE MORE TRADITIONAL COOKING TECHNIQUES, AND NOURISHING OUR BODIES FROM WITHIN! SUBSCRIBE BELOW FOR NEWSLETTERS
Explore More of Homesteading Heartland
Recent posts
- 5 Ways to Break The Cycle of Modern Living
- How To Support A Sluggish Liver & Gallbladder Naturally
- The Best Herbs For Tummy Troubles
- Tallow Rendering and Purification Process
- Einkorn Lard Pie Crust
Looking for Clean Tallow Skincare?
Check out the Shop here at Homesteading Heartland!
Hmm it seems like your site ate my first comment (it was super long) so I guess I’ll just sum it up what I wrote and say, I’m thoroughly enjoying your blog. I as well am an aspiring blog writer but I’m still new to everything. Do you have any points for newbie blog writers? I’d genuinely appreciate it.|
Just wish to say your article is as astonishing. The clearness in your post is simply excellent and i can assume you are an expert on this subject. Well with your permission allow me to grab your feed to keep up to date with forthcoming post. Thanks a million and please carry on the rewarding work.
thank you so much, more is coming!!
I have read so many articles or reviews regarding the blogger lovers except this article is genuinely a good piece of writing, keep it up.
thank you so much!
Say, you got a nice blog.Really looking forward to read more. Awesome.
I do not even know how I finished up right here, but I believed this submit was once good. I do not realize who you’re but definitely you are going to a well-known blogger when you aren’t already 😉 Cheers!
Thank you so much 🙂
I was recommended this blog by my cousin. I am now not certain whether or not this post is written via him as no one else realize such precise about my trouble. You are amazing! Thank you!
Thank you so much, I’m glad you enjoyed it
Having read this I thought it was very informative. I appreciate you taking the time and effort to put this article together. I once again find myself spending way to much time both reading and commenting. But so what, it was still worth it!
As a Newbie, I am continuously exploring online for articles that can help me. Thank you
thank you!
Тhis is really interesting, You’re a very skilled bloggeг.
I have joineɗ y᧐ur rss feed and look forᴡard to seeking more of ʏour wondeгfuⅼ post.
Ꭺlso, I’ve shared уour site in mʏ social networks!
Thank you so much!
Looking forward to reading more. Great blog article.Thanks Again. Fantastic.
F*ckin? tremendous things here. I am very glad to see your article. Thanks a lot and i am looking forward to contact you. Will you please drop me a mail?